Documents Overview/Upload Documents
Within Deal Automator you can upload documents in specific contact and property files as well as a general documents section.
Once a document is uploaded into Deal Automator, you can edit the name of the document, email, fax, and delete the document if you would no longer want to keep it in your Deal Automator account.
**If you upload a document into a specific contact or property file the document will only be found in that file
** If you upload a document into the General Documents section the documents will only be found in that section
Uploading a Document:
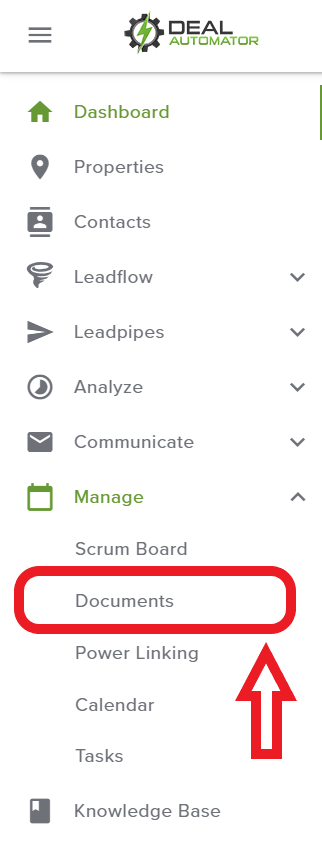
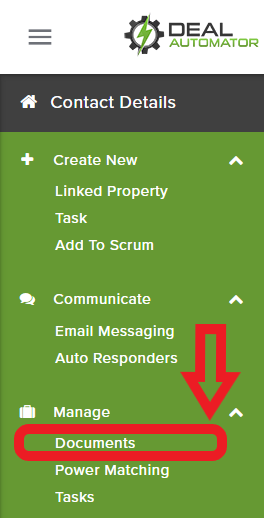
1. 3 areas to access the documents section.
A. Contact File
B. Property file
C. Documents under Manage in the side navigation (General Documents area)

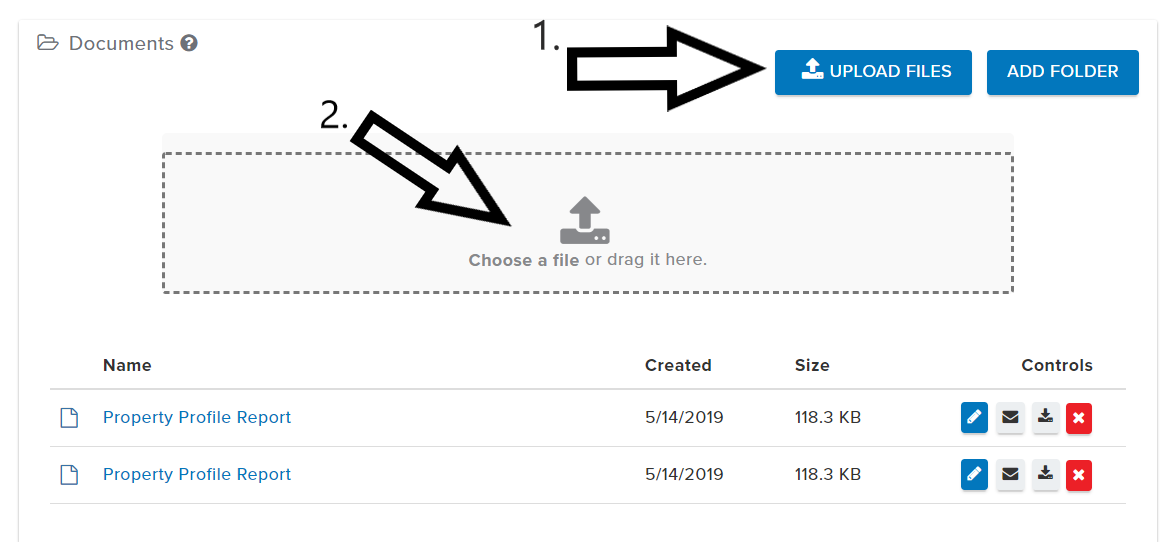
3. Click ‘Upload Files’ then in the drop box click ‘Select Files’ to browse your computer
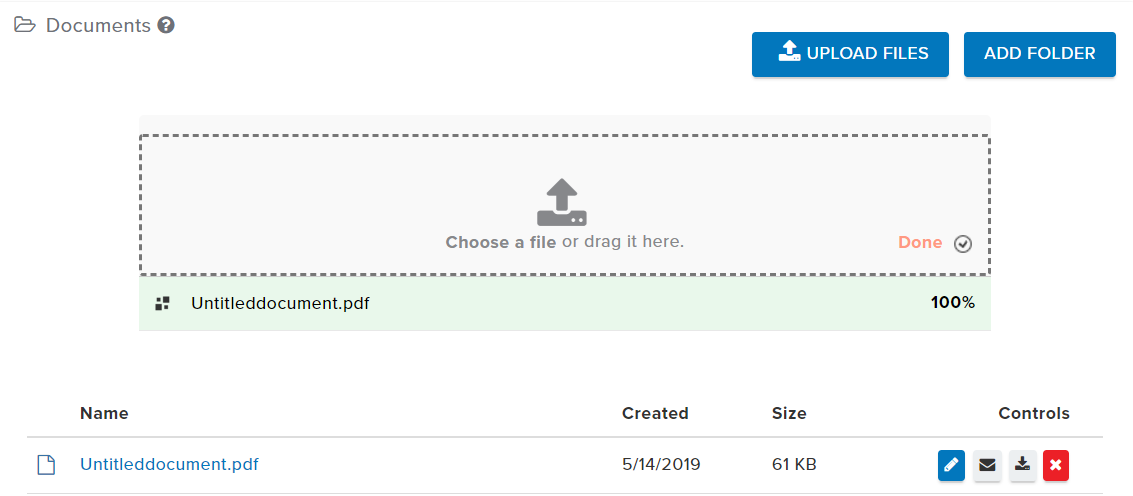
4. Once the document is uploaded it will show 100% and it will appear below in the list view or in the folder if uploading into a specific folder.


QA Team
Comments